The Smoke Stopper Protocol: Save Your Stack on First Power-Up
A critical electronics guide explaining the function of a smoke stopper, bench testing procedures, current thresholds, and warning flags on the first battery connection.
The FPV Builder's Definitive Protocol: Mastering Your Smoke Stopper from First Power-Up to Fault Isolation
Every FPV pilot knows the chilling dread of the 'first power-up.' It's the moment of truth where weeks of careful soldering and configuration either culminate in a triumphant beep or, far worse, the dreaded 'magic smoke.' This isn't just a myth; it's a very real, very expensive consequence of a short circuit. But what if there was an unseen guardian, a silent sentinel standing between your precious electronics and an untimely demise? Enter the FPV smoke stopper.
This isn't just another gadget; it's a critical diagnostic tool, and mastering its protocol is paramount for any builder, from novice to seasoned veteran. We're not just talking about plugging it in; we're diving deep into a systematic approach to leveraging this essential device for diagnostic precision, component longevity, and ensuring your build's maiden voyage isn't its last. Let's demystify the smoke stopper and establish a definitive protocol that empowers you to power up with confidence.
The Unseen Guardian: What Exactly is an FPV Smoke Stopper?
At its core, an FPV smoke stopper is a current-limiting device designed to prevent catastrophic damage to your drone's electronics in the event of a short circuit. Think of it as a safety valve for your power system during those critical initial power-ups. Instead of allowing a full, unregulated surge of current from your LiPo battery to an unintended short, it restricts the flow, giving you time to identify and rectify the problem before components are irreversibly damaged.
Beyond a Fuse: How It Works Its Magic
While a fuse offers protection by breaking a circuit once a certain current threshold is exceeded (and then needs replacement), a smoke stopper works differently. Most common smoke stoppers employ one of two primary mechanisms:
- Incandescent Light Bulb: A classic, simple, and highly effective method. When a short circuit occurs, current rushes through the bulb. The bulb's filament heats up rapidly, its resistance dramatically increases, and it glows brightly, effectively limiting the current flow to the shorted component. The brilliance of this approach is its self-resetting nature – once the short is removed, the bulb cools, its resistance drops, and it's ready for the next test.
- Electronic Current Limiter: More sophisticated stoppers use active electronic components like polyfuses (PPTCs - Polymer Positive Temperature Coefficient thermistors) or current-sensing circuitry with MOSFETs. These devices precisely monitor current flow and, upon detecting an overcurrent condition, either increase their resistance dramatically (PPTC) or actively cut off power, often indicated by an LED. Modern electronic stoppers like the VIFLY ShortSaver 2 or the HGLRC Thor offer features like adjustable trip currents, auto-reset functions, and clear LED indicators, providing a more refined diagnostic experience.
In both cases, the goal is the same: to prevent excessive current from flowing into a short, which would otherwise lead to rapid heat buildup and component destruction.
The 'Magic Smoke' Mythos & The Electrical Reality
The term "magic smoke" is a darkly humorous ode to the pungent, acrid smell and visible vapor released when an electronic component fails catastrophically due to overcurrent. This isn't just a metaphor; it's the physical manifestation of a capacitor exploding, an integrated circuit burning out, or a MOSFET melting down.
The electrical reality is that components have specific voltage and current ratings. A short circuit bypasses the intended load, creating an extremely low resistance path between the positive and negative terminals of your battery. This causes an enormous surge of current (dictated by Ohm's Law, I = V/R, where R approaches zero). This uncontrolled current generates immense heat, leading to rapid, irreversible damage – and the release of that infamous "magic smoke." Common culprits for shorts include:
- Stray solder blobs bridging pads.
- Loose carbon fiber dust or tiny screws making contact with exposed traces.
- Incorrectly wired components (e.g., VTX connected to a higher voltage than it can handle, or reverse polarity).
- Pinched wires.
Why Every FPV Builder Needs This Critical Tool
The smoke stopper is not an optional luxury; it's an essential part of any FPV builder's toolkit. Here's why:
- Component Protection: The most obvious benefit. It can save expensive flight controllers, ESCs, VTXs, and cameras from instant destruction.
- Cost Savings: Replacing a fried FC or VTX can cost anywhere from $30 to $100+. A smoke stopper is a one-time investment that can save you multiples of its own cost.
- Time Savings: Diagnosing a dead component and waiting for a replacement takes time. A smoke stopper helps you catch issues early, allowing for quick fixes.
- Peace of Mind: Powering up a new build or a repaired drone is inherently stressful. A smoke stopper transforms this into a controlled diagnostic process, boosting your confidence.
- Diagnostic Aid: It's not just a protector; it's a valuable diagnostic indicator, telling you if there's a problem and aiding in where to look.
Anatomy of a Safety Net: Understanding Smoke Stopper Types
While the core function remains the same, smoke stoppers come in a few flavors, each with its own characteristics.
The Classic Bulb-Based Stopper: Simplicity in Action
The original and often still preferred choice for many, the bulb-based smoke stopper is wonderfully straightforward. It typically consists of an automotive incandescent bulb (e.g., a single-filament 1156 or P21W bulb, often 21W/12V) wired in series with your battery's positive lead.
Pros:
- Inexpensive: You can literally make one for a few dollars with a bulb socket, a bulb, and an XT60 connector.
- Robust: Very little to go wrong electronically.
- Visual Feedback: The brightness of the bulb directly correlates to the current draw, offering intuitive visual diagnostics. A dim glow is normal, a bright glow indicates a short.
- Self-Resetting: As long as the bulb doesn't burn out (rare in typical short scenarios), it's ready for repeated use.
Cons:
- Less Precise: The current limiting threshold isn't exact and varies with the specific bulb.
- Higher Quiescent Current: Even with no short, the drone's normal operation will cause a slight current draw, meaning the bulb will always glow faintly. This can sometimes make it harder to distinguish a very minor issue from normal operation.
- Physical Size: Bulbs can be somewhat bulky.
Modern Electronic Current Limiters: Precision & Features
These are purpose-built devices, often compact and featuring advanced circuitry. Popular examples include the VIFLY ShortSaver 2 and the HGLRC Thor Smoke Stopper.
Pros:
- Precision: Often have a defined current trip point (e.g., 1A, 2A, 3A), which can sometimes be adjustable.
- Clear Indicators: Usually feature LEDs (green for normal, red for short) or even small digital displays.
- Compact Size: Generally smaller and more streamlined than bulb-based versions.
- Lower Quiescent Current: When not tripped, they typically draw very little power, making it easier to see if the drone itself has a baseline current draw.
- Auto-Reset: Many automatically reset after a short is removed.
Cons:
- More Expensive: Cost significantly more than a DIY bulb stopper.
- Potentially More Fragile: Contains more delicate electronic components.
- Can Be Overridden: Some might have a "bypass" mode or higher trip current, which needs careful handling.
DIY vs. Off-the-Shelf: Weighing Your Options
- DIY (Bulb-based): Excellent for beginners on a budget. Provides fundamental protection and diagnostic capability. Requires basic soldering skills to assemble.
- Off-the-Shelf (Electronic or Pre-built Bulb): Offers convenience, often better build quality, and advanced features (for electronic versions). Ideal for those who prefer a ready-to-go solution or desire more precise diagnostics. For example, the VIFLY ShortSaver 2 provides selectable trip currents (1A/2A) and a rapid auto-reset, which is a significant upgrade over a simple bulb.
Ultimately, either type is vastly better than no smoke stopper at all.
The Definitive FPV Smoke Stopper Protocol: Your First Power-Up Sequence
This protocol is designed to minimize risk and maximize diagnostic information during the critical first power-up of any new build or after significant repairs.
Pre-Power Checks: The Crucial Steps Before Connecting
Before you even think about connecting that LiPo, perform these vital checks:
-
Visual Inspection (The Eagle Eye):
- Solder Joints: Carefully examine every solder joint under magnification if possible. Look for cold joints, bridges, or splashes of solder where they shouldn't be.
- Wire Routing: Ensure no wires are pinched, frayed, or positioned where they could contact carbon fiber or metal components.
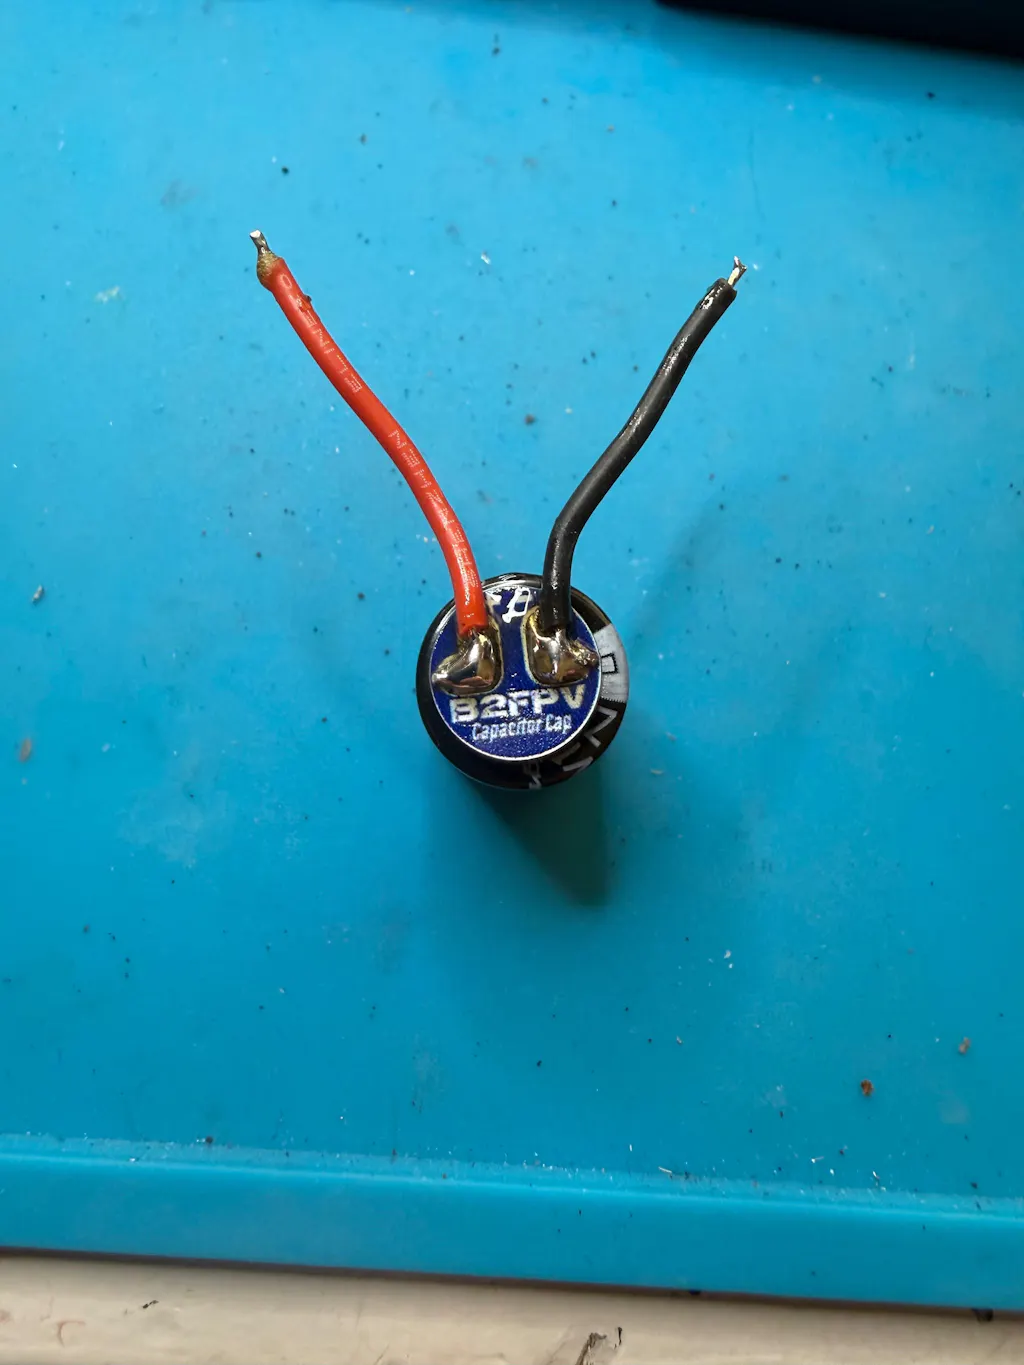
- Component Orientation: Double-check the polarity of electrolytic capacitors (striped side is negative), VTXs, RXs, and cameras. Many components are highly sensitive to reverse polarity.
- Debris: Check for any loose carbon dust, tiny screws, or stray strands of wire that could cause a short. Use compressed air if needed.
- Insulation: Verify that heat shrink tubing is properly applied to ESCs and other exposed connections.
-
Continuity Check with a Multimeter (The Silent Detective):
- Power Pads: Set your multimeter to continuity mode (the beep function).
- Main Battery Pads (XT30/XT60): Place one probe on the main positive battery pad and the other on the main negative battery pad. YOU SHOULD NOT HEAR A BEEP. A beep indicates a direct short between your main power rails, which is a critical failure point. A reading of "OL" (open loop) or a very high resistance (Megaohms) is what you want.
- Other Power Rails: Briefly check continuity between other power outputs (e.g., 5V to GND, 3.3V to GND) if accessible. You should typically see an open circuit or very high resistance here too, especially before anything is powered up. Be cautious, as some components might present a low but normal resistance.
Pro Tip from the Field: Always start with the main battery pads. If you have a short here, you've saved yourself from powering up a guaranteed brick.
The Initial Connection: What to Observe and Expect
- Connect Smoke Stopper: Plug your smoke stopper into your LiPo battery.
- Connect Drone: Plug the drone's XT60/XT30 connector into the smoke stopper.
- Observe Immediately: The moment you connect, pay close attention to the smoke stopper's behavior and listen for any unusual sounds from the drone.
Interpreting the Signals: Normal Operation vs. Fault Indication
This is where understanding your smoke stopper is crucial.
-
Bulb-Based Stopper:
- Normal: The bulb will light up very dimly for a moment, then might either stay very dim or flicker slightly as the flight controller and other components draw their quiescent current and capacitors charge. This is a good sign.
- Fault (Short): The bulb will light up brightly and stay bright. This indicates a significant short circuit. Immediately disconnect the LiPo.
-
Electronic Stopper (e.g., VIFLY ShortSaver 2):
- Normal: The LED indicator will typically turn green (or similar "all clear" color). The drone will likely emit its normal boot-up beeps from the ESCs and FC.
- Fault (Short/Overcurrent): The LED indicator will turn red, flash, or the device might beep. Power to the drone will be cut off or severely limited. This indicates an overcurrent condition or short. Immediately disconnect the LiPo.
Critical Action: If your smoke stopper indicates a short (bright bulb, red LED, power cut), immediately disconnect the LiPo battery. Do not leave it connected, even with the smoke stopper engaged, as prolonged exposure to limited current can still stress components.
Systematic Fault Isolation: Pinpointing the Problem Area
If a short is detected, follow these steps:
- Disconnect Battery: Ensure the LiPo is completely disconnected from the smoke stopper and drone.
- Visual Re-Inspection: Perform another detailed visual inspection. Look for any signs of physical damage like burn marks, melted insulation, or discolored components. Sometimes, a short will manifest as a component getting noticeably warm very quickly.
- Component Disconnection (The Divide and Conquer Method):
- Begin by disconnecting non-essential peripherals: VTX, FPV camera, RX, GPS module, LEDs. If your ESCs are separate from the FC, disconnect them too.
- Reconnect the smoke stopper and LiPo.
- If the short is gone (normal smoke stopper behavior), then the fault lies in one of the components you just disconnected. Reconnect them one by one, testing after each connection, until the smoke stopper indicates a short again. The last component reconnected is the culprit.
- If the short persists after disconnecting all peripherals, the problem is likely on the flight controller itself or the main power distribution (if separate from the FC). In this case, you might need to desolder the FC from the frame or disconnect individual components from the FC to isolate.
- Common Short Locations:
- Capacitors: Often the first to fail with reverse polarity or overvoltage.
- VTX: Can short if connected to too high a voltage or if antenna is not connected during power-up (though this usually just damages the VTX, not necessarily the FC).
- Camera: Small solder pads can be easily bridged.
- ESC Power Pads: Solder bridges are common here.
Pro Tip from the Field: When disconnecting components, start with the most exposed or recently soldered items. If you just soldered a VTX, that's your first suspect.
Decoding the Diagnostics: Understanding Smoke Stopper Behavior
Let's break down the nuanced signals your smoke stopper provides.
The Green Light: All Clear for Takeoff (Almost)
- Electronic Stopper: A solid green LED (or similar "OK" indicator) means the current draw is within normal limits. This is what you want to see. Your flight controller should boot up, you should hear the ESC beeps, and your receiver should bind.
- Bulb-Based Stopper: A very dim, almost imperceptible glow, or a brief flicker as capacitors charge, followed by near darkness. This indicates the drone's quiescent current draw is low and normal.
What to do: If you get a green light or dim bulb, proceed to connect your drone to Betaflight Configurator (or similar firmware tool). Check that all components are detected (accelerometer, gyroscope, receiver, VTX, camera feed). If everything looks good, you can remove the smoke stopper and connect the LiPo directly for full power and motor testing (always with props off!).
The Dim Bulb/Low Current: Normal Load or Minor Glitch?
- Bulb-Based Stopper: The bulb glows faintly but consistently, brighter than just a flicker, but not full bright.
- Electronic Stopper: The LED might still be green, but if it has a current display, you might see a slightly elevated current draw (e.g., 0.5A - 1A, depending on your setup).
Interpretation: This is often normal during initial boot-up as various components (VTX, RX, camera) initialize and draw power. However, if it stays consistently brighter than expected for a bulb, or if the current draw is higher than the typical quiescent current of your components combined (usually 100-300mA for a modern quad without motors), it could indicate a minor issue. Action: Let it sit for 10-15 seconds. If it doesn't brighten further and the drone boots normally, it's likely fine. If you're concerned, use your multimeter to check voltages on various pads (5V, 3.3V, VTX IN/OUT) to ensure they are correct and stable. A component drawing slightly too much current could be faulty but not shorted.
The Bright Bulb/High Current: Short Circuit Detected!
- Bulb-Based Stopper: The bulb immediately lights up very brightly and stays that way.
- Electronic Stopper: The LED turns red, flashes, beeps, or the device cuts power. The current display will show a high value, often at the trip point.
Interpretation: This is a definitive short circuit. Current is flowing unimpeded, and the smoke stopper is actively limiting it to prevent damage. Action: Immediately disconnect the LiPo battery. Do not hesitate. Then, follow the Systematic Fault Isolation steps outlined above.
No Power/No Indication: When the Stopper Stays Silent
- Bulb-Based Stopper: The bulb doesn't light up at all, and the drone shows no signs of life.
- Electronic Stopper: No LEDs light up, no beeps, nothing.
Interpretation: This usually means there's no power reaching the drone. Action:
- Check Smoke Stopper: Ensure the smoke stopper itself is functioning. Try plugging it into just the LiPo; some electronic ones will light up green even without a drone.
- Check LiPo: Is the LiPo charged? Is its connector damaged?
- Check Connections: Are all connectors fully seated between the LiPo, smoke stopper, and drone?
- Open Circuit: It's possible (though rare for a new build) that there's an open circuit within the drone – a break in the main power path – preventing any current flow. This would be indicated by a multimeter continuity check showing an open circuit where it should be closed (e.g., between the XT60 pads and the FC's main power input).
Advanced Strategies: Beyond the Basic Power-Up
A smoke stopper isn't just for the first power-up; it's a versatile diagnostic tool.
Sectional Testing: Isolating Components Incrementally
For complex builds or stubborn shorts, you can use the smoke stopper to test sections of your drone in isolation.
- Start Minimal: Power up only your flight controller (if possible, by desoldering everything else). Check with the smoke stopper.
- Add Components: One by one, solder or reconnect your ESCs, then your VTX, then RX, then camera, etc. Test with the smoke stopper after each addition. This pinpoints the exact component or connection causing the short.
- Example: If the FC alone passes, but adding the VTX causes a short, you know the VTX or its wiring is the issue.
Pro Tip from the Field: This method is more time-consuming but incredibly effective for hard-to-find shorts. It requires patience and meticulousness.
The Multimeter's Role: Partnering for Precision Diagnostics
Your multimeter is the smoke stopper's best friend.
- Continuity Checks: As mentioned, pre-flight continuity checks are vital.
- Voltage Checks: After a successful smoke stopper test (green light/dim bulb), use your multimeter to verify voltages on key pads:
- 5V pads: Should read close to 5V.
- 3.3V pads: Should read close to 3.3V.
- VTX power input: Should match the expected voltage (e.g., VBAT, 9V, 5V).
- Receiver power input: Usually 5V. These checks confirm that the power regulation on your FC is working correctly and that components are receiving the correct voltage.
Post-Repair Verification: Ensuring the Fix Holds
Never assume a repair is complete just because you've fixed the visible problem. Always re-test with the smoke stopper after any repair, resoldering, or component replacement. This ensures your fix hasn't introduced a new short or exposed another underlying issue. It's cheap insurance against repeating the "magic smoke" experience.
Equipping Your Workbench: Choosing the Right Smoke Stopper
Selecting the right smoke stopper depends on your budget, experience level, and desired features.
Key Features and Specifications to Consider
- Connector Type: Most FPV drones use XT30 or XT60 connectors. Ensure your smoke stopper has the correct input/output connectors for your batteries and drone. Adapters can be used, but direct connection is always best.
- Voltage Rating: Make sure the smoke stopper can handle the voltage of your LiPo batteries (e.g., up to 6S for most FPV drones). Most commercial stoppers are rated for at least 6S (25.2V).
- Current Trip Point (Electronic): For electronic stoppers, check the trip current. A lower trip current (e.g., 1A) offers more sensitive protection but might trip unnecessarily with higher loads. A higher trip current (e.g., 3A) is less sensitive but might allow more current to flow during a fault. Some, like the VIFLY ShortSaver 2, offer selectable trip points.
- Auto-Reset Feature: This is a convenient feature for electronic stoppers, allowing them to automatically reset once the fault is cleared.
- Indicators: Clear LED indicators (green/red) or even a small display showing current draw are highly beneficial for diagnostics.
Bulb vs. Electronic: Which One Suits Your Needs?
- Bulb-Based: Best for beginners, budget-conscious builders, or those who appreciate the robust simplicity and intuitive visual feedback. It's a fantastic entry-level safety device.
- Electronic: Ideal for intermediate to advanced builders who want more precise control, clear digital feedback, and additional features like adjustable trip points. Brands like VIFLY and HGLRC offer excellent electronic options.
Budget vs. Reliability: Making an Informed Decision
While you can build a DIY bulb stopper for under $10, a quality electronic smoke stopper might cost $25-$40. Consider this an investment. The potential cost of frying a flight controller (often $50-$100+) far outweighs the price of a good smoke stopper. Don't compromise on safety and diagnostic capability to save a few dollars.
Frequently Asked Questions About Smoke Stoppers
Let's address some common queries to further clarify the role and limitations of this vital tool.
Can a smoke stopper prevent ALL types of electrical damage?
No. A smoke stopper primarily protects against short circuits that cause excessive current draw. It will not protect against:
- Reverse polarity if the component is designed to handle it briefly without immediately shorting (though it's still very bad). If reverse polarity causes an immediate short, the stopper will trip.
- Overvoltage from an external source (e.g., plugging a 6S battery into a 4S-max VTX without causing a short).
- Electrostatic Discharge (ESD).
- Component failure due to manufacturing defects or normal wear and tear. It's a crucial layer of protection, but not an infallible shield against all possible electrical mishaps.
How long should I keep my drone connected to the smoke stopper?
You should only keep your drone connected to the smoke stopper for initial power-up and basic functional checks. This includes:
- Verifying the FC boots up.
- Hearing ESC beeps.
- Checking basic connectivity in Betaflight (accelerometer, gyro, receiver, VTX feed).
- Briefly testing voltage outputs with a multimeter. Do not fly with it, and do not test motors with it. Running motors draws significant current, which will trip the smoke stopper or cause the bulb to glow brightly, preventing proper motor function and potentially stressing the stopper itself. Once initial checks are done, disconnect the smoke stopper and connect your LiPo directly.
My smoke stopper always lights up slightly, even without a short. Is this normal?
Yes, for bulb-based smoke stoppers, a very dim, constant glow is normal. This is due to the inherent quiescent current draw of your flight controller, receiver, and other always-on components. This current is usually in the range of tens to hundreds of milliamps, which is enough to cause a faint glow in an incandescent bulb. For electronic stoppers, you might see a low current reading (e.g., 0.1A - 0.3A) on a display, but the indicator LED should remain green.
What's the difference between a smoke stopper and a regular fuse?
The key difference lies in their function and reusability:
- Fuse: A one-time protective device. When current exceeds its rating, a sacrificial wire melts, breaking the circuit permanently. The fuse must then be replaced. Fuses are for operational protection.
- Smoke Stopper: A reusable diagnostic tool. It limits current (bulb) or trips/cuts power (electronic) when an overcurrent condition is detected, preventing damage without destroying itself. It can be reset and reused repeatedly for testing. Smoke stoppers are for diagnostic testing and initial power-up protection.
Can I use a smoke stopper for testing motors or high-current components?
No, absolutely not. Smoke stoppers are designed to protect against short circuits during low-power diagnostic phases. Motors draw a significant amount of current, even at idle (tens of amps), and much more under load. Attempting to test motors with a smoke stopper will immediately trip an electronic stopper or cause a bulb-based stopper to glow intensely, preventing the motors from receiving sufficient power to spin properly. This renders the test useless and can unnecessarily stress the smoke stopper. Always remove the smoke stopper before performing motor tests or flying.
Conclusion
The FPV smoke stopper is more than just a safety device; it's an indispensable diagnostic partner that empowers you to approach every new build or repair with a newfound level of confidence. By understanding its mechanics, meticulously following a systematic protocol, and interpreting its signals, you transform a potentially nerve-wracking first power-up into a controlled, informative diagnostic session.
Don't let the fear of 'magic smoke' deter your building ambitions. Equip yourself with this knowledge, integrate the smoke stopper into your workflow, and power up smart. Go build with confidence, fly with precision, and keep that magic smoke where it belongs – in the realm of myth.
Have a smoke stopper tip or a 'magic smoke' story to share? Drop it in the comments below, and check out our other FPV safety guides to further fortify your workbench!
Copyright-safe media generated locally by FPVLovers