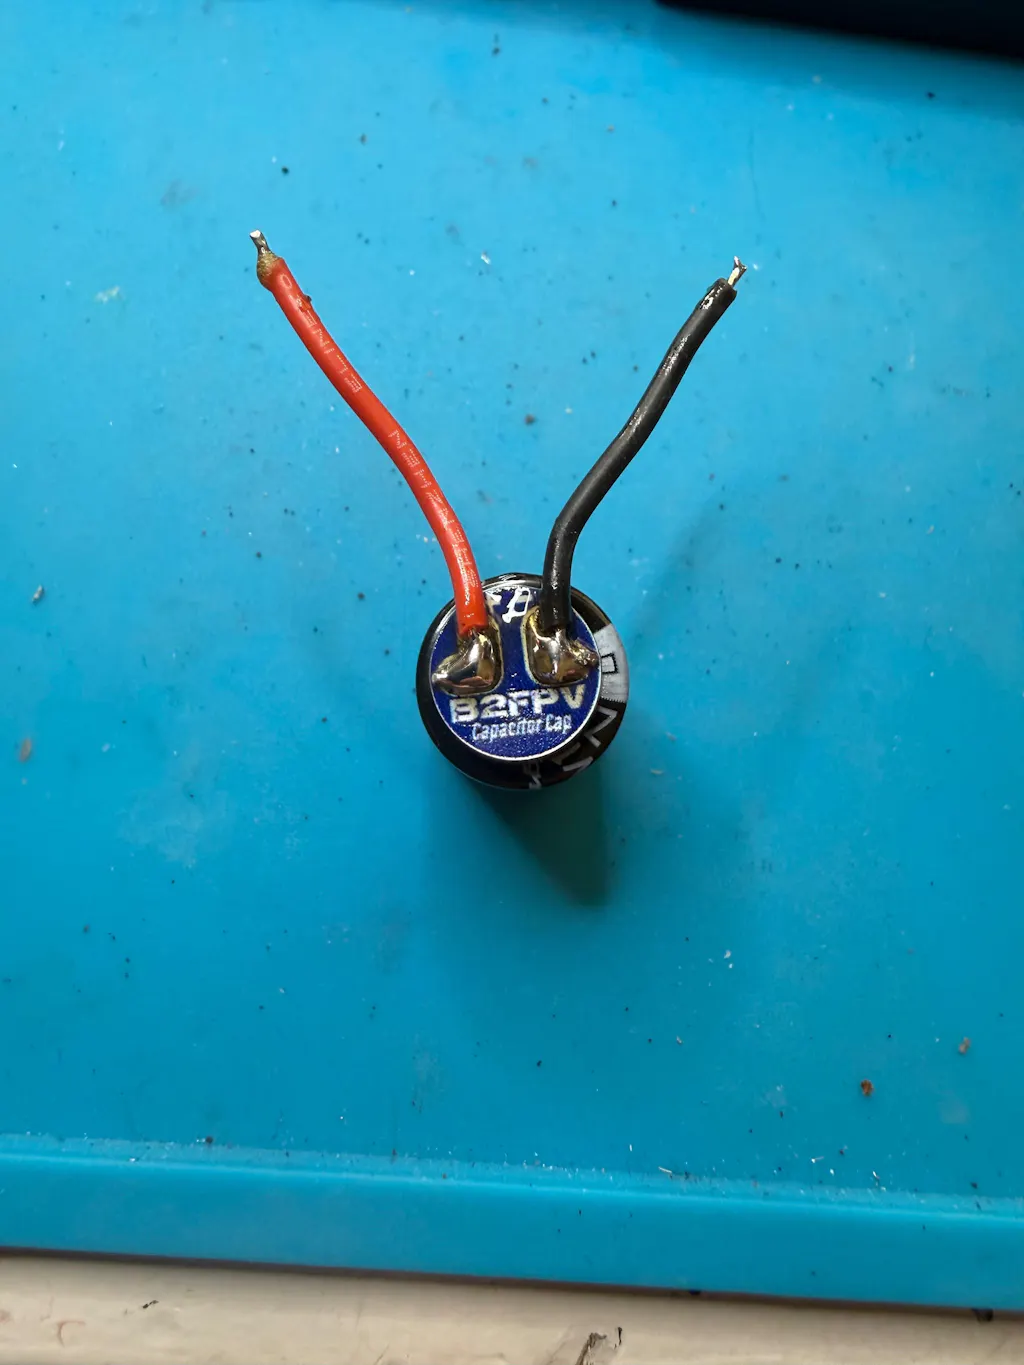
Soldering Guide for FPV Drone Builders: Solder Pads, Temperature, and Tools
A hands-on build tutorial covering essential soldering equipment (TS100/TS101, pinecil), choosing leaded vs lead-free solder, using flux, tinning wires, and soldering motor and ESC pads.
Soldering Guide for FPV Drone Builders: Solder Pads, Temperature, and Tools
The FPV Pilot's Guide to Bulletproof Soldering: Master Clean Connections, Prevent Failures, and Build with Confidence
Merhaba FPV tutkunları! Whether you're a seasoned pilot or just embarking on your journey into the thrilling world of FPV drones, there's one skill that will define the reliability and performance of your build more than any other: soldering. It’s not just about melting metal; it's about forging robust, invisible bonds that withstand the g-forces of a power loop, the impact of a minor crash, and the relentless vibrations of high-RPM motors.
Introduction: Unlock Your FPV Potential with Bulletproof Soldering
The Critical Role of Soldering in FPV Drone Builds
Your FPV drone is a symphony of interconnected electronic components – flight controller, ESCs, motors, VTX, RX, camera, and battery. Each connection, no matter how small, needs to be perfect. A shaky solder joint can lead to anything from intermittent video feed and dropped signals to catastrophic power failures mid-flight. In the high-stakes, high-vibration environment of FPV, "good enough" soldering simply isn't good enough. We aim for bulletproof.
What You'll Master: From Basics to Advanced FPV Soldering Techniques
This comprehensive guide will take you from understanding the fundamental FPV soldering tools to mastering advanced techniques for delicate components. We’ll cover everything from tinning FPV pads and achieving the perfect joint to how to solder FPV ESCs and troubleshoot common issues like cold solder joints. By the end, you'll have the knowledge and confidence to tackle any FPV build with precision.
Why Reliable Connections Mean the Difference Between Flight and Failure
Imagine soaring through a gap, executing a perfect dive, only for your video feed to cut out due to a loose VTX connection, or worse, a motor to desync because of a failing ESC joint. These are the nightmares of FPV pilots, often caused by poor soldering. Investing time in learning proper techniques means more exhilarating flights, fewer frustrating repairs, and ultimately, a safer and more enjoyable FPV experience.
Gearing Up: Essential FPV Soldering Tools & Workspace Setup
Before you even think about heating up your iron, ensure you have the right arsenal of tools and a well-prepared workspace.
The Heart of Your Setup: Soldering Irons, Tips, and Temperature Settings (FPV soldering tools, soldering iron settings FPV)
- Soldering Iron/Station: This is your primary tool. For FPV, you need an iron with sufficient power (at least 60W, preferably 80W+) and precise temperature control.
- Budget-Friendly & Portable: The TS101 (or its predecessor TS100) and Pinecil are fantastic options. They are compact, heat up incredibly fast, and offer excellent temperature stability, making them perfect for bench work and field repairs.
- Bench Station: For a dedicated workshop, a Hakko FX-888D or Weller WES51 (or similar) offers robust performance, though they take up more space.
- Tips: Invest in a variety of tips. A chisel tip (2.4mm or 3.2mm) is your workhorse for most pads, especially ESCs and power leads. A fine conical tip (0.8mm - 1.2mm) is essential for delicate work on flight controllers and tiny pads. Ensure your tips are always clean and tinned.
- Temperature Settings: This is crucial. For standard 63/37 leaded solder, a range of 320°C - 380°C (600°F - 720°F) is generally ideal. For lead-free solder, you'll need to go higher, typically 370°C - 420°C (700°F - 790°F). Always adjust based on the size of the pad and component – larger pads require more heat to reach temperature quickly, preventing cold joints.
Must-Have Consumables: Solder, Flux, and Desoldering Aids (best solder for FPV, flux for FPV soldering)
- Solder: For FPV, leaded solder (63% tin, 37% lead - 63/37) is highly recommended. It has a lower melting point, flows better, and creates stronger, shinier joints compared to lead-free options. Look for rosin core solder to aid in fluxing. Kester 63/37 is a popular choice among FPV pilots. Use a thickness of 0.8mm or 1.0mm for versatility.
- Flux: This is your secret weapon for perfect joints. Flux cleans oxidation from pads and wires, allowing solder to flow smoothly and adhere properly. A no-clean flux paste like Amtech NC-559-ASM is excellent. Apply it with a syringe or a small brush.
- Desoldering Braid/Wick: Essential for cleaning up mistakes, removing excess solder, or desoldering components. Look for good quality copper braid, often soaked in flux.
- Solder Sucker/Pump: Another option for desoldering, especially for larger pads or through-hole components.
Supporting Tools: Helping Hands, Multimeters, and Essential Safety Gear
- Helping Hands/PCB Holder: Invaluable for holding PCBs and wires steady. A good third-hand tool or a dedicated FPV soldering jig (like a SpeedyBee or similar) will save you immense frustration.
- Tweezers: Fine-tipped tweezers are a must for manipulating small wires and components.
- Wire Strippers/Cutters: Precision tools are key for preparing wires without damaging strands.
- Multimeter: Absolutely critical for checking continuity, identifying shorts, and diagnosing power issues. Learn to use its continuity mode.
- Safety Glasses: Solder can spit. Always protect your eyes.
- Fume Extractor/Fan: Solder fumes are toxic. A small fan to blow fumes away or a dedicated fume extractor is highly recommended.
- Isopropyl Alcohol (IPA) & Cotton Swabs/Brush: For cleaning flux residue after soldering.
Optimizing Your Workspace for Clean and Efficient FPV Builds
- Good Lighting: Crucial for seeing small pads and solder joints clearly.
- Clean Surface: A silicone mat or heat-resistant mat protects your desk and helps keep small screws from rolling away.
- Organized Tools: Keep everything within easy reach to maintain focus and efficiency.
Mastering the Fundamentals: Core Soldering Techniques for FPV
Preparing Your Components: Cleaning, Tinning Pads, and Pre-Tinning Wires (tinning FPV pads)
Preparation is 80% of the battle.
- Cleanliness: Ensure all pads and wire ends are free of dirt, oil, or oxidation. A quick wipe with IPA can help.
- Tinning Pads: Apply a small amount of flux to the pad. Touch your tinned iron tip to the pad, then quickly touch solder to the pad (not the iron). The solder should flow smoothly and cover the pad with a thin, shiny layer. Remove solder, then iron. This prevents oxidation and ensures quick, reliable connections.
- Pre-Tinning Wires: Strip your wire (about 2-3mm), twist the strands tightly, apply flux, then touch your iron tip to the wire and feed solder into the strands until they are fully coated and shiny. This makes connecting wires to pads much easier and stronger.
The Perfect Solder Joint: Achieving Strong, Shiny, and Conductive Connections
A perfect solder joint is:
- Shiny and Smooth: Dull, grainy joints are often "cold solder joints" (more on this later).
- Concave (Wetted): The solder should flow up the wire and onto the pad, forming a smooth, concave fillet, like a small volcano. This indicates good adhesion.
- Mechanically Strong: It should hold the wire firmly without needing additional support.
- Electrically Conductive: No shorts, no breaks.
The "Heat-Solder-Remove Solder-Remove Iron" Method:
- Apply a tiny bit of flux to the pre-tinned pad.
- Place your pre-tinned wire onto the tinned pad.
- Touch your hot, clean, and tinned iron tip to both the wire and the pad simultaneously.
- Once the solder on the wire and pad melts, remove the iron.
- Hold the wire still for a few seconds as the solder cools and solidifies. This is critical to prevent cold joints.
Connecting Wires & Components: Through-Hole vs. Surface Mount Basics
- Through-Hole: Wires or component legs pass through holes in the PCB. Solder is applied to the pad on the opposite side, flowing through the hole and securing the component. Common for battery connectors, some older ESCs.
- Surface Mount (SMD): Components sit directly on top of pads on the PCB. Most modern FPV components (flight controllers, VTXs, RXs) use SMD pads, which are smaller and require more precision. The technique described above for pre-tinned wires and pads is ideal here.
Desoldering Like a Pro: Safely Removing Components and Cleaning Pads (desoldering FPV components)
Mistakes happen, or you might need to upgrade. Desoldering is an art.
- Add Fresh Solder: Sometimes adding a blob of fresh, leaded solder to an old joint helps it melt and flow better, especially with lead-free factory solder.
- Solder Wick: Place the copper braid over the joint. Press your hot iron tip onto the braid. The braid will absorb the molten solder. Lift the iron and braid together. Repeat with fresh sections of braid until the pad is clean.
- Solder Sucker: Heat the joint until the solder melts. Quickly remove the iron and immediately activate the solder sucker over the molten solder. This works well for larger joints or through-hole components.
- Clean Up: After desoldering, always clean the pad with IPA to remove flux residue and prepare it for a new component.
FPV-Specific Soldering Scenarios: From ESCs to Flight Controllers
High-Current Connections: Soldering ESCs and Motors for Maximum Performance (how to solder FPV ESC)
- ESCs: These pads are usually larger and require more heat. Use a larger chisel tip (e.g., 3.2mm) and a higher temperature (e.g., 380°C) to get the pad up to temperature quickly.
- Motor Wires: Pre-tin the motor wires generously. Tin the ESC motor pads. Align the wires (A, B, C) correctly, then use the "heat-solder-remove" method. Ensure a strong, convex joint that can handle high current and vibration.
- Power/Signal Wires: For ESC power (battery) and signal wires, follow the same pre-tinning and joining method. Ensure battery wires are robust and strain-relieved.
- Battery Leads: These are crucial. Use appropriately thick wire (e.g., 12AWG for 5-inch quads) and a high-power iron. Ensure the joint is perfectly wetted and has a good fillet. After soldering, use heat shrink tubing to insulate the connections.
Delicate Work: Soldering Flight Controllers, VTXs, and RXs (small FPV components)
- Flight Controllers (FC): These have tiny pads. Use a fine conical tip (0.8mm-1.2mm) and slightly lower temperature (e.g., 320-350°C) to avoid overheating surrounding components.
- Signal Wires: Strip wires minimally (1-2mm), pre-tin them very finely. Apply a tiny dab of flux to the FC pad. Gently place the pre-tinned wire on the pad, touch with the iron for just a second or two until solder flows, then remove.
- VTX/RX: Similar to FCs, these often have small pads for signal, power, and ground. Take your time, use plenty of light, and ensure you don't bridge pads.
- Practice Tip: If you're new to this, practice on an old, discarded PCB or even a cheap FC before attempting your main components.
Power Distribution & Battery Leads: Ensuring Robust and Safe Connections (FPV wiring guide)
- Battery Connectors (XT60/XT30): These require a lot of heat. Secure the connector in a helping hand. Pre-tin the wire, then fill the connector cup with solder. Heat the cup again, insert the pre-tinned wire, and hold until solid. Crucially, solder one pin at a time and let it cool completely before doing the next to avoid melting the plastic insulator between the pins.
- Power Leads to FC/PDB: For direct soldering to a power distribution board (PDB) or FC, ensure you use thick enough wire and create strong, well-wetted joints capable of handling peak current draws without resistance or heat build-up. Always check for shorts with a multimeter before connecting the battery.
Advanced Tips: Bridging Pads, Working with Tiny Components, and Heat Management
- Bridging Pads: Sometimes, for specific configurations (e.g., UART selection), you might need to bridge two small pads. Use a very fine tip and a tiny amount of solder, or even a strand of wire, to create a clean bridge.
- Working with Tiny Components (SMD): For truly tiny components like resistors or capacitors, you might need "drag soldering" (for ICs) or the "two-iron method." For most FPV builds, pre-tinning and careful placement with a fine tip is sufficient.
- Heat Management: When soldering near sensitive components (e.g., processor on an FC), use a heat sink (like a small alligator clip) on the wire, or work quickly and allow components to cool between joints. Use Kapton tape to protect surrounding areas if needed.
Troubleshooting & Prevention: Avoiding Common FPV Soldering Mistakes
Identifying and Fixing Cold Solder Joints (cold solder joint FPV)
- Symptoms: Dull, grainy, pitted, or cracked appearance. The solder might look like a blob sitting on top of the pad rather than flowing into it. Often causes intermittent connections or complete failure.
- Cause: Insufficient heat, not holding the wire still long enough during cooling, or dirty pads/wires.
- Fix: Reheat the joint, add a tiny bit of fresh solder and flux, and ensure the iron makes good contact with both the wire and the pad until the solder re-flows into a shiny, smooth, concave shape. Hold still while it cools.
Bridging, Shorts, and Solder Blobs: Causes, Cures, and Prevention
- Symptoms: Solder connecting two adjacent pads or traces that shouldn't be connected. Leads to shorts, component damage, or malfunction.
- Cause: Too much solder, imprecise iron control, or excessive flux causing solder to spread.
- Fix: Use desoldering wick to carefully remove the excess solder. If it's a small bridge, sometimes just touching a clean, hot iron tip to it will pull the excess away.
- Prevention: Use the right amount of solder, a suitably sized tip, and good lighting. Inspect every joint carefully before moving on.
Overheating and Component Damage: Protecting Your Sensitive FPV Electronics
- Symptoms: Discoloration on the PCB, burnt plastic, lifted pads (where the copper pad detaches from the board), or component failure.
- Cause: Iron temperature too high, holding the iron on the component/pad for too long, or repeated heating cycles.
- Prevention: Use appropriate temperatures, work quickly, and allow components to cool. Use a heat sink if working on very sensitive components or for prolonged periods. Never force a wire into a pad; if it doesn't melt and flow, add flux and ensure proper heat.
The Final Inspection: How to Spot and Correct Imperfections Before Flight
After all soldering is complete:
- Visual Inspection: Use a magnifying glass or your phone's camera (zoom in!) to meticulously check every single joint. Look for shiny, smooth, concave joints. Check for bridges, stray solder balls, or lifted pads.
- Continuity Check (Multimeter): With your multimeter in continuity mode, check for shorts where there shouldn't be any (e.g., between positive and negative battery pads, between adjacent signal pads). Also, check continuity for power lines to ensure they aren't open circuits.
- Power Up Safely: Before connecting the main battery, use a smoke stopper. This cheap but invaluable device can save your components from instant death if you have a short.
The FPV Soldering Buyer's Guide: Investing in Your Workshop
Recommended Soldering Irons and Stations for FPV Pilots
- Beginner/Portable: TS101/TS80P or Pinecil. Excellent value, portability, and performance. Often powered by XT60, perfect for FPV batteries.
- Intermediate/Dedicated Bench: Hakko FX-888D or Weller WES51. Reliable, powerful, and durable for frequent use.
- Pro-Grade: JBC CD-2SD (or similar). Top-tier performance with instant heat recovery, but a significant investment.
Choosing the Best Solder and Flux for FPV Applications (best solder for FPV)
- Solder: Kester 63/37 (rosin core, 0.8mm or 1.0mm) is the gold standard for FPV. Its superior flow and lower melting point make it forgiving and reliable.
- Flux: Amtech NC-559-ASM (no-clean paste) is highly recommended. For convenience, a flux pen can also be useful for quick applications.
Essential Accessories and Safety Gear for a Complete Setup
- Helping Hands: A heavy-duty model with alligator clips or a dedicated PCB holder.
- Tweezers: ESD-safe, fine-tipped.
- Multimeter: Any decent digital multimeter with continuity mode.
- Wire Strippers: Precision strippers like the Knipex 12 40 200.
- Safety Glasses & Fume Extractor.
- Smoke Stopper: A non-negotiable safety device for first power-ups.
Budget-Friendly vs. Pro-Grade Setups: What's Right for You?
You don't need the most expensive gear to start. A TS101/Pinecil, some good 63/37 solder, Amtech flux, and a basic multimeter will get you very far. As you progress and solder more frequently, you might consider upgrading your iron for better heat recovery or investing in more specialized tools. The key is to have reliable tools that perform consistently.
Frequently Asked Questions (FAQ)
What's the ideal soldering temperature for FPV electronics?
For leaded 63/37 solder, typically 320°C - 380°C (600°F - 720°F). For larger pads (ESCs, battery leads), aim for the higher end; for delicate FC/VTX pads, the lower end. The goal is to heat the joint quickly to minimize overall heat exposure to the component.
Can I use lead-free solder for FPV, and what are the considerations?
Yes, you can, but it's generally not recommended for beginners or for FPV where reliability under stress is paramount. Lead-free solder has a higher melting point, is harder to work with, flows less easily, and can result in duller, less robust joints if not done perfectly. You'll need a higher iron temperature and more patience.
How do I prevent damaging sensitive FPV components with excessive heat?
Use the lowest effective temperature, work quickly (2-3 seconds per joint), use plenty of flux, and ensure your iron tip is clean and tinned for efficient heat transfer. Allow components to cool between joints, and consider using a small heat sink for very sensitive areas.
My solder isn't flowing properly; what am I doing wrong?
This is usually due to:
- Insufficient Heat: Iron temperature too low, or tip too small for the pad.
- Dirty Surfaces: Pads or wires are oxidized or greasy.
- Lack of Flux: Flux is essential for cleaning and promoting flow.
- Untinned Tip: A dirty or oxidized iron tip won't transfer heat efficiently.
How do I troubleshoot and fix a bad solder joint on my FPV drone?
First, identify the bad joint (often visually, or by continuity testing). If it's a cold joint, reheat it with a dab of flux and fresh solder until it re-flows properly. If it's a short, use desoldering wick to remove the excess solder. If a pad is lifted, it's more serious; you might need to scrape off the solder mask and bridge to another point on the trace, which requires advanced skill. Always re-test with a multimeter after any repair.
Conclusion: Build with Confidence, Fly with Reliability
Recap: Your Journey to Becoming an FPV Soldering Master
You've now walked through the entire process of FPV soldering, from setting up your workspace and understanding your tools to mastering core techniques and tackling FPV-specific challenges. You know how to achieve that coveted "bulletproof" joint, troubleshoot common issues, and prevent failures before they happen.
The Confidence of a Well-Built Drone: Enjoying More Flight Time
Every perfectly soldered joint is a testament to your skill and attention to detail. This translates directly into a drone that performs reliably, withstands the rigors of FPV flying, and allows you to push your limits without worrying about a critical connection failing. The satisfaction of flying a drone you built with your own hands, knowing every connection is rock solid, is immense.
Call to Action: Start Building Your Next FPV Drone with Precision Today!
Don't let soldering intimidate you. Grab your iron, practice on some scrap, and apply these techniques to your next FPV build. With patience, practice, and the right approach, you'll soon be building drones with confidence and enjoying more exhilarating flights than ever before. Happy soldering, and happy flying!
Copyright-safe media generated locally by FPVLovers